Very Quick Terrain for Games....
For more specific Zombicide Wulfsburg building files, [Click Here]
For more specific Zombicide Green Horde building files, [Click Here]
For more specific Zombicide White Death battlement walls, [Click Here]
For more specific Zombicide Green Horde building files, [Click Here]
For more specific Zombicide White Death battlement walls, [Click Here]
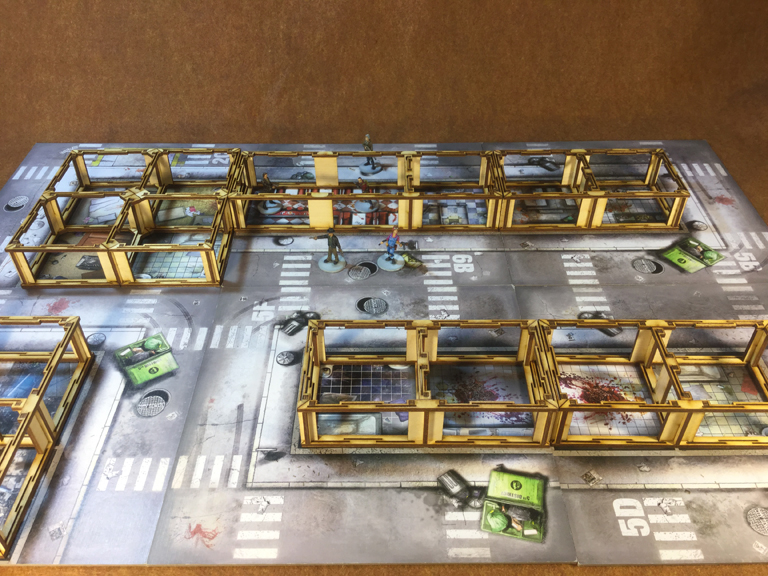
I really like Zombicide. It's so easy to teach, to play, to enjoy all the plastic eye candy. And when the medieval version came out I was again thrilled with the art. And so I wanted to give these games one more boost in the way of 3d terrain. Not only to add to the atmosphere, but to help myself and others more easily visualize the terrain features. Wulfsburg towers and now Green Horde ledges have varying elevations that are easier grasped in 3D.
A couple of design intents I'm going for... no painting.... or at least minimal, fast spraying. And no complicated folding of paper. Simple cuts with a blade and ruler. Something that can be put together in an evening and look good with minimal effort. So here we go.....
A couple of design intents I'm going for... no painting.... or at least minimal, fast spraying. And no complicated folding of paper. Simple cuts with a blade and ruler. Something that can be put together in an evening and look good with minimal effort. So here we go.....
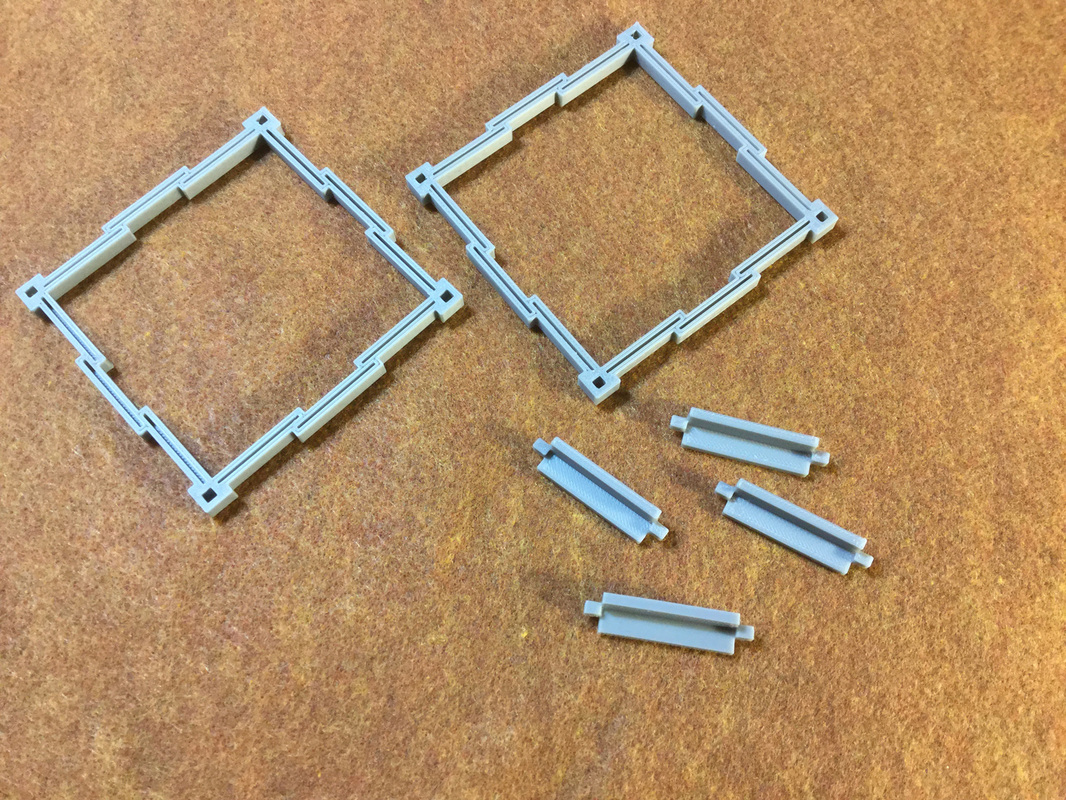
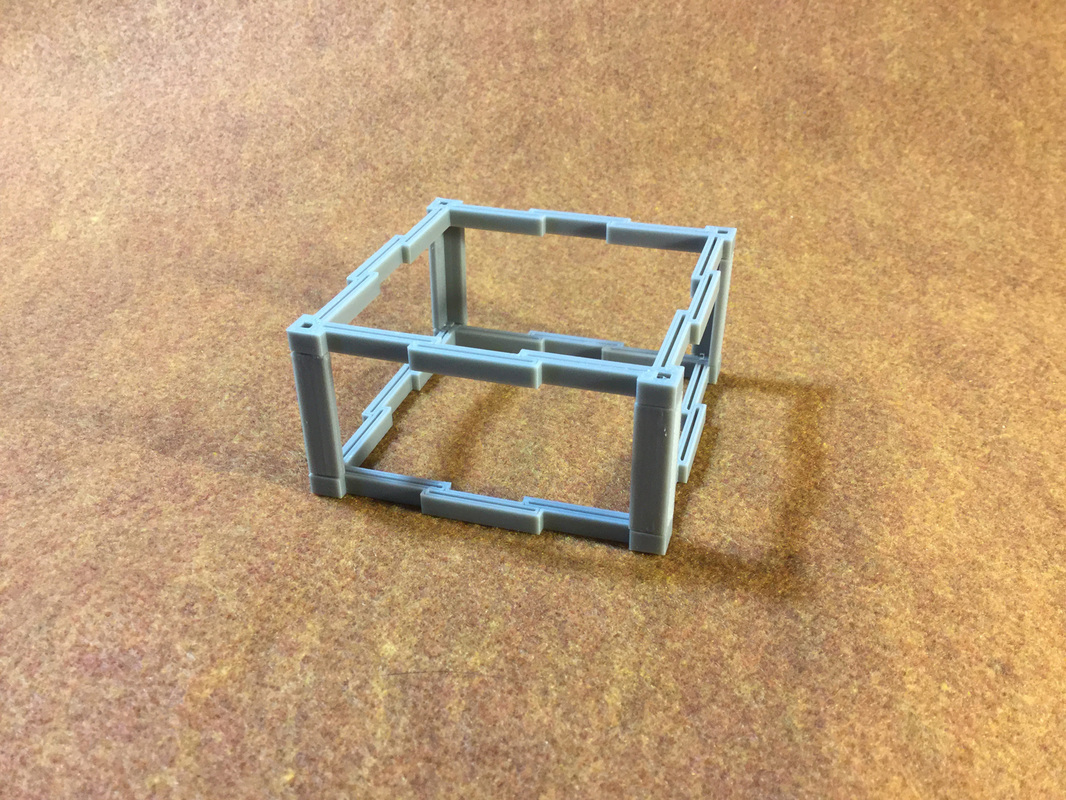
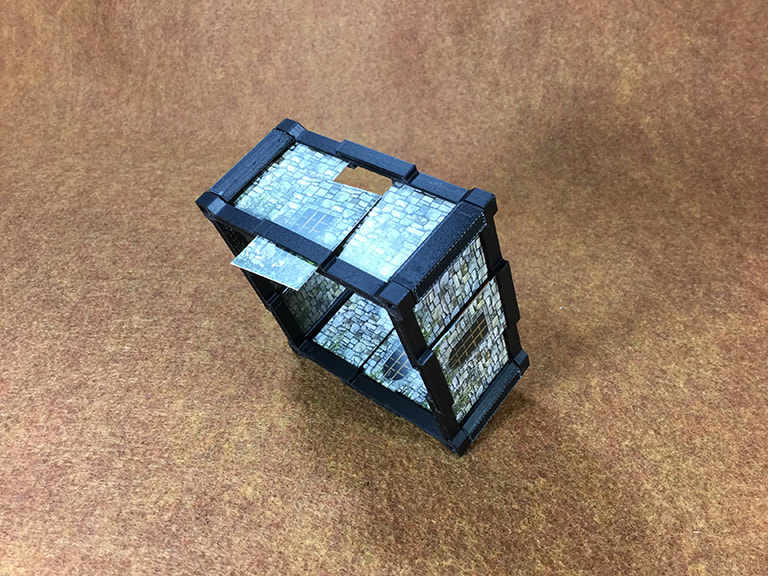
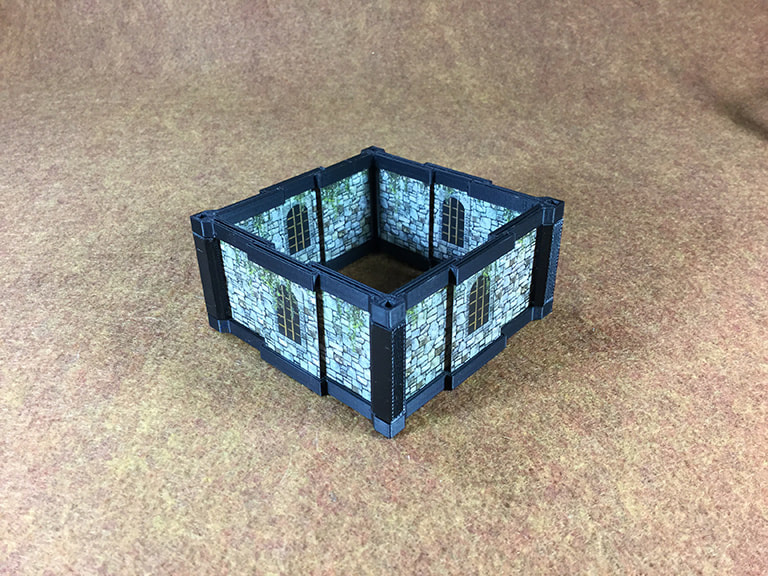
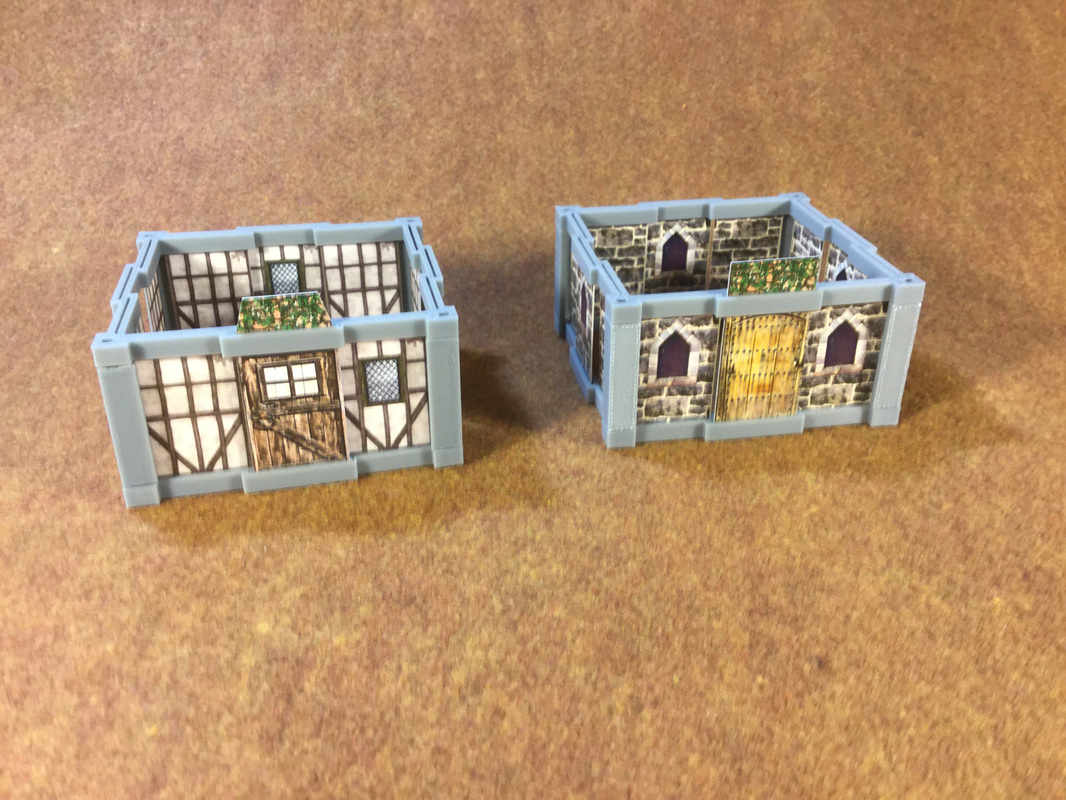
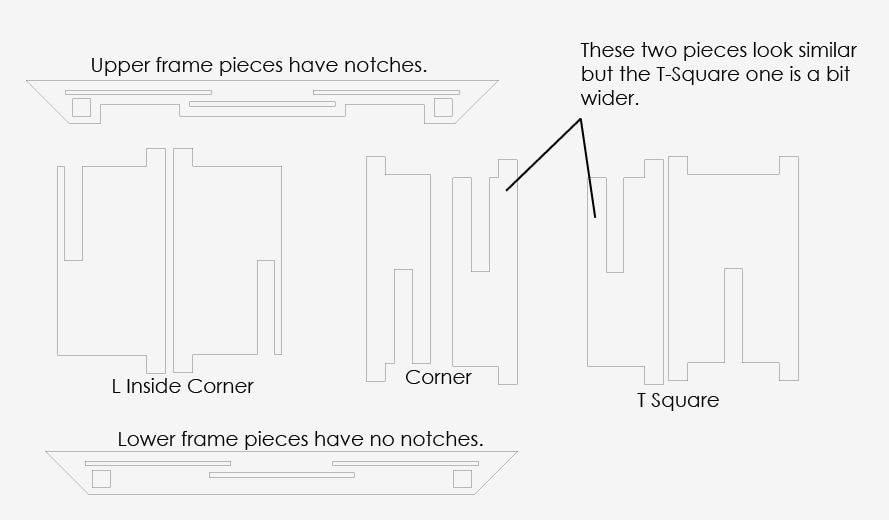
My first designs were 3D printed frames that simple wall tiles can slide into. The top frame has open slots. The lower frame has a closed bottom so that the tiles don't fall through.
As I go, I'll be adding files for download on this and other pages.
So, if you're interested in trying this type of design, right below are the STL files to print them.
So, if you're interested in trying this type of design, right below are the STL files to print them.
As I get feedback, such pictures of how these files have worked for others, I'll add more for downloads.
| panel_frame_-_top.stl |
| panel_frame_-_bottom.stl |
| pillar.stl |
Though they look good, the one downside of the aforementioned design is that is doesn't secure the panels enough to take a tumble without needing to put the panels back in place. One could place a small patch of tape over the top of each slot, but there may be better designs. More on that later.
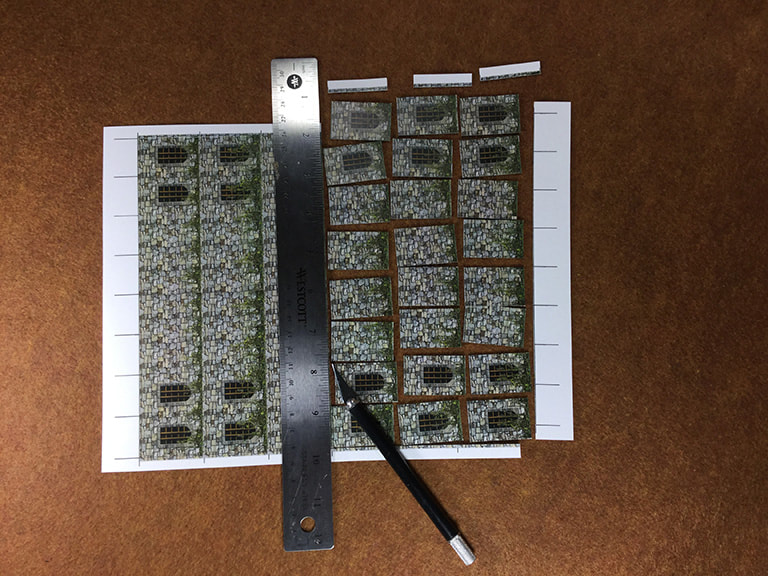
Next item on our list are some wall panels. There's some upfront effort on my parts but each design adds variety and eliminates painting. All one has to do is simply print out a sheet on heavy paper stock, make some simple cuts and slide them into frames.
For basic panel sheets, 16 simple straight cuts yields 48 panels. If the sheet is printed on both sides then only one panel is needed per section.
Artwork for doors may be taller so that a handle above the frame is available to open [pull out] the door. Simply slide the door back in when you need to close it. All the panels are the same width, so putting doors towards the corners is just as easy as centering them.


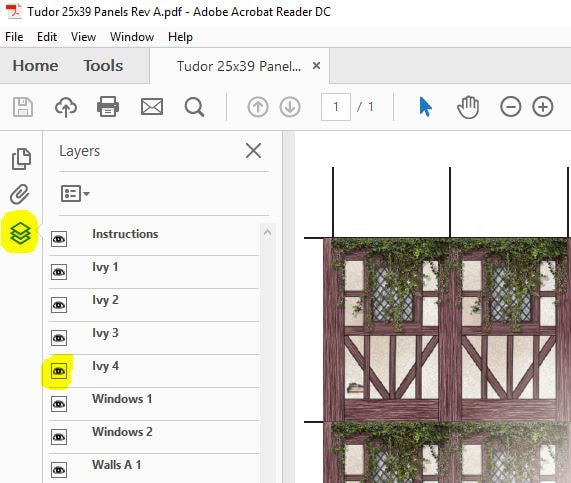
A bit farther below are some files if you're inclined to test out the 3D printed frames with panels. They are PDFs and so you will need Acrobat Reader. Open the layers panel and you can tailor the walls by turning on and off different features.
You will be highly disappointed if you try to print the panels on office paper, which is 20lb or 24lb at best. The panels will be very flimsy.
I use an 80lb cover stock and it works extremely well. The panels are rigid like a playing card. If you are using a laser printer, don't forget to set the paper type to heavy, so the printer can slow down the print, giving extra time [heat] needed to properly fuse the toner to the paper.
I use an 80lb cover stock and it works extremely well. The panels are rigid like a playing card. If you are using a laser printer, don't forget to set the paper type to heavy, so the printer can slow down the print, giving extra time [heat] needed to properly fuse the toner to the paper.
| tudor_25x39_panels_rev_a.pdf |
| doors_medieval_-_samples.pdf |
| castle_keep_25x39_panels_rev_a.pdf |
| panels_-_castle_keep_70x39_full_panels_rev_a.pdf |
| doors_antique_25x50_rev_b.pdf |
| deep_dungeon_25x39_panels_rev_a.pdf |
| deep_dungeon_70x39_panels_full_rev_a.pdf |
As I get feedback, such pictures of how these files have worked for others, I'll add more for downloads.
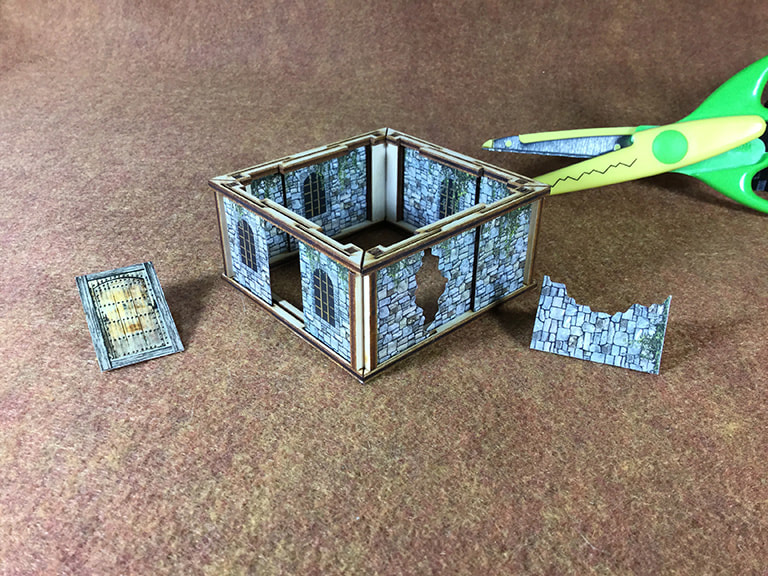
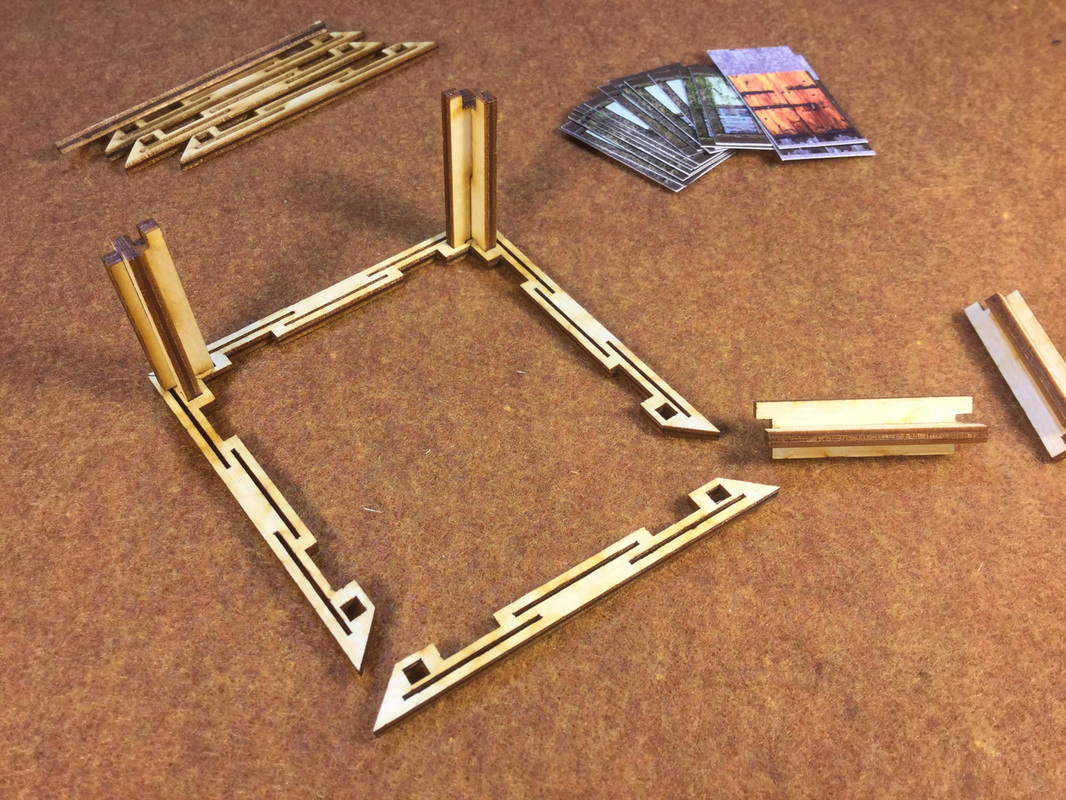
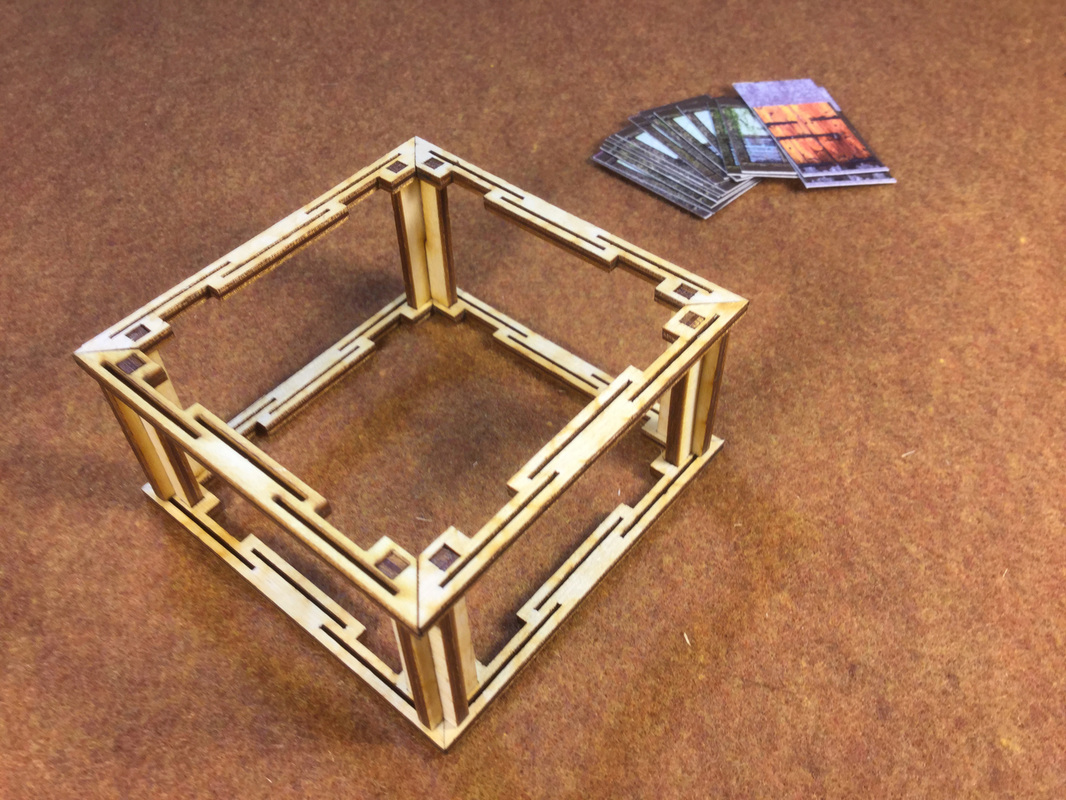
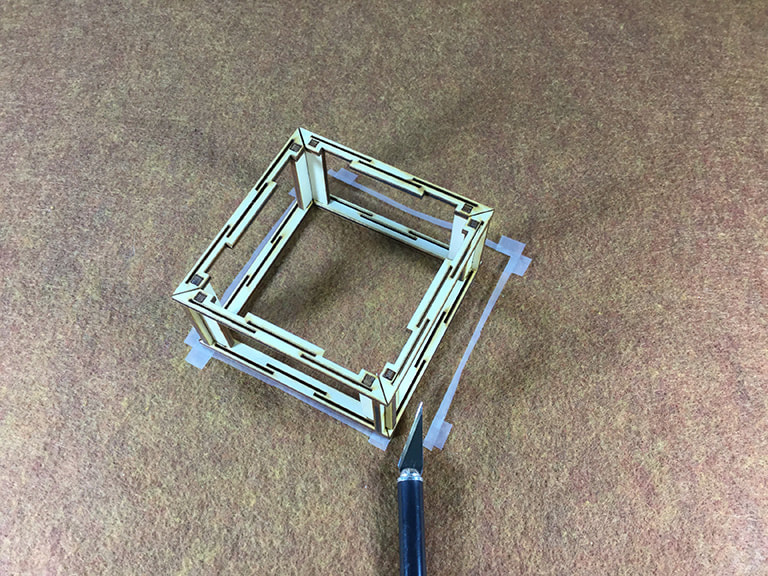
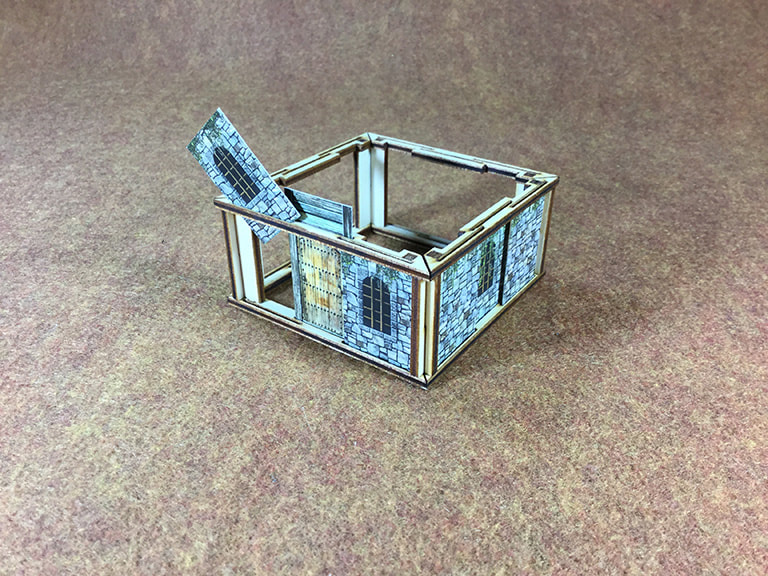
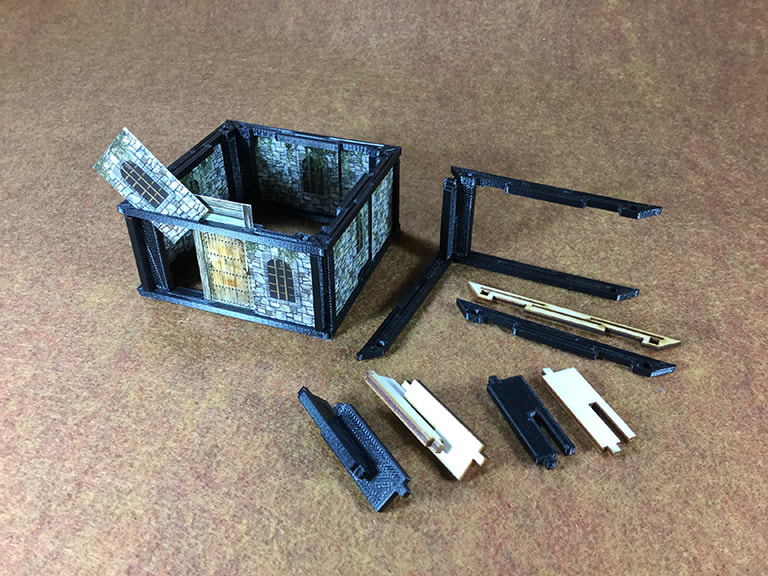
Next up came some experiments with laser cutting parts, and how they would compare to 3D printing. The structures have to be a bit different as everything is made from flat pieces. Once assembled, a drop of cyanoacrylate ["super glue"], craft or wood glue on each square tab helps further hold them together.

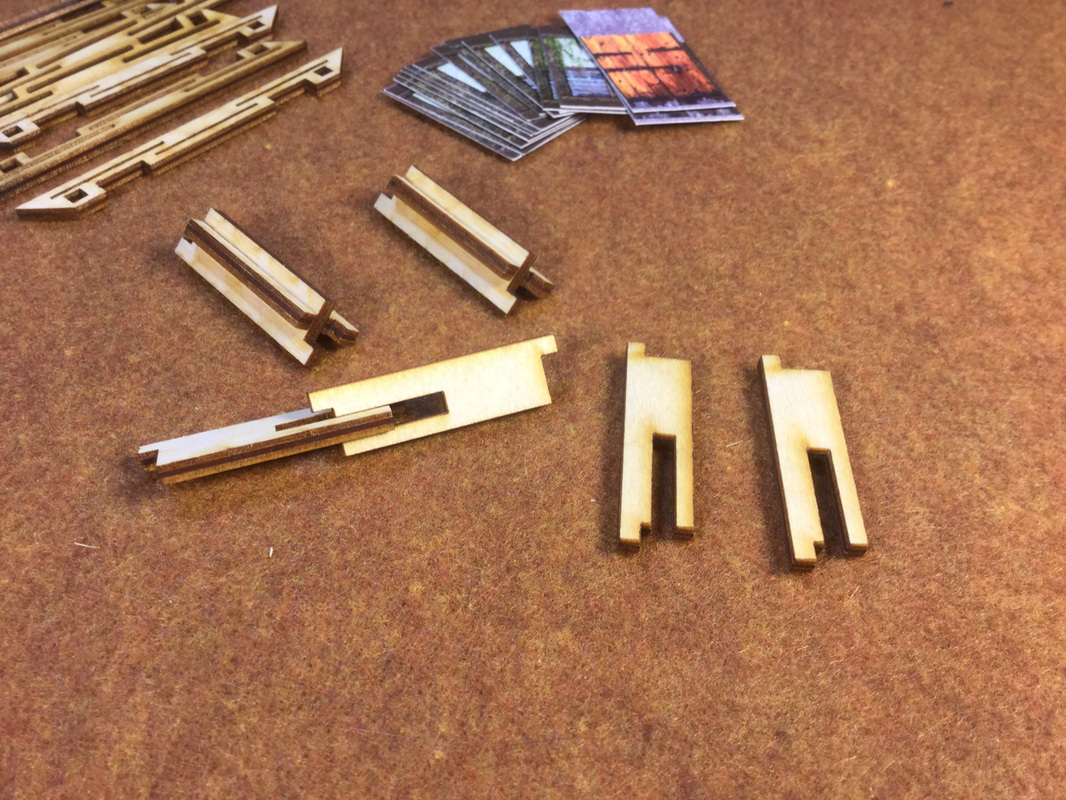
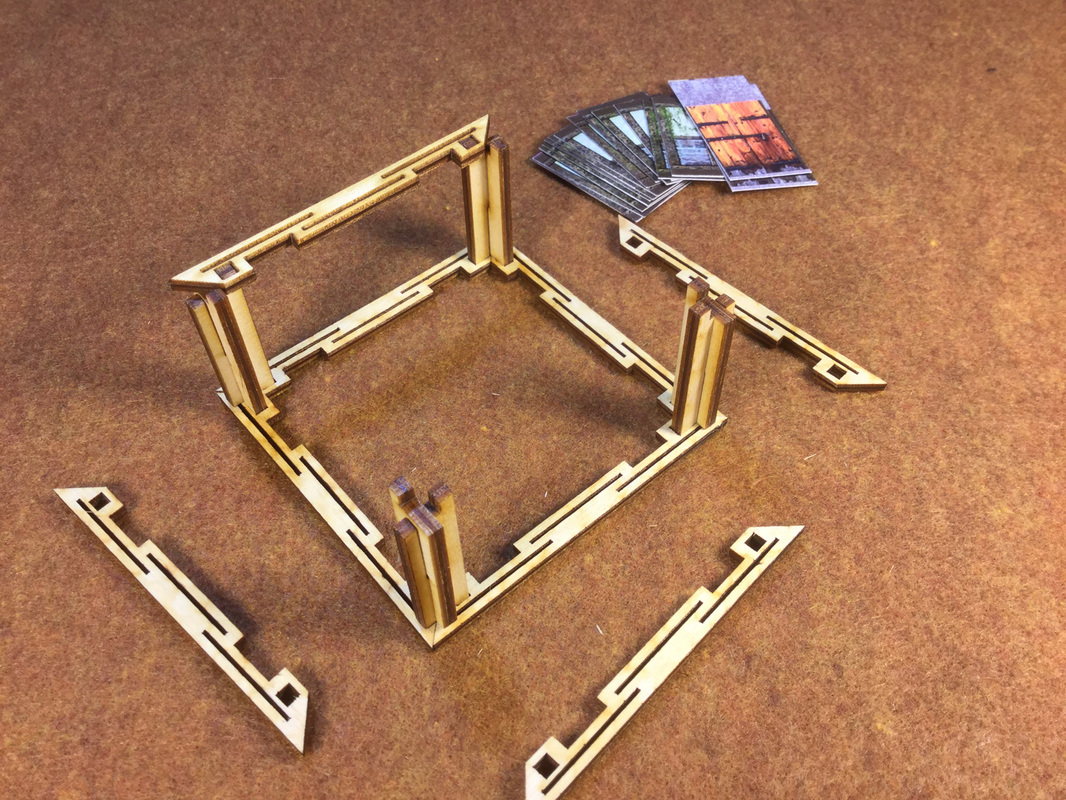

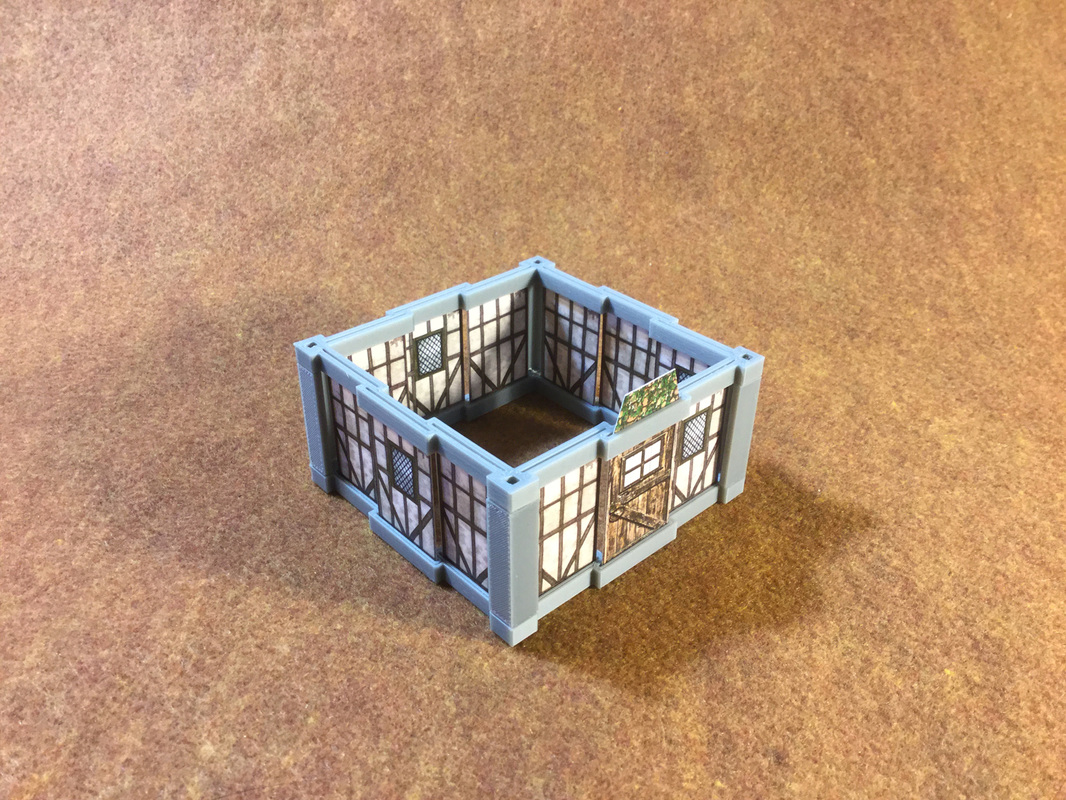
The lower sections of the frames have lower slots cut all the way through, so by themselves they don't keep the panels from falling out the bottom. But that worked out to be a benefit rather than a disadvantage.
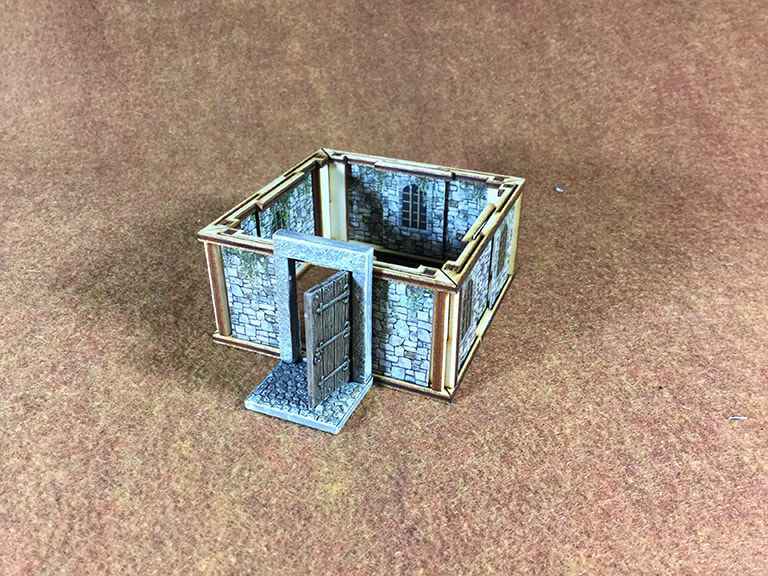
And this is why. To create a bottom to the slots I used strips of adhesive tape. The tape not only keeps the panels from falling through, it holds them in place, so tossing the buildings around during play or storage isn't a problem at all. Because the tape holds only the bottom edge of each panel, with a gentle pull they can be pulled out to open and close a door or replace the panels with a new theme or artwork. Redecorating is easy.
I have pulled panels in and out repeatedly and have yet to need to replace the tape on any buildings.
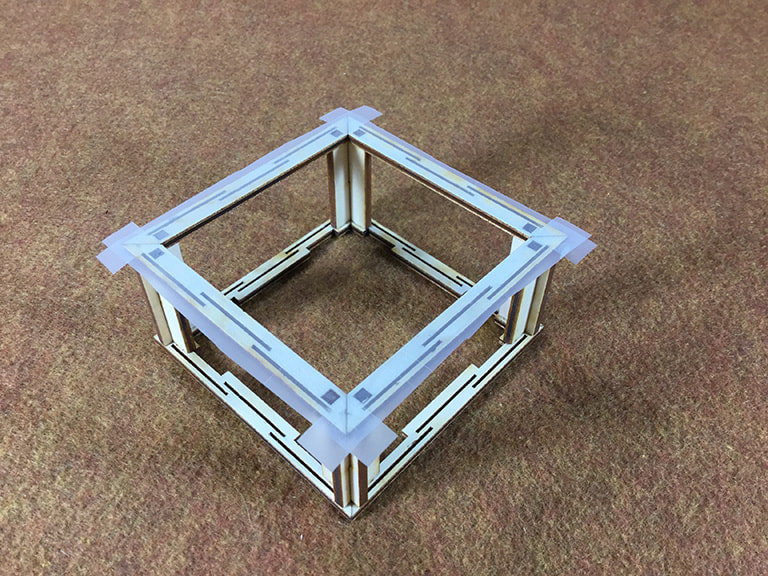
And this is why. To create a bottom to the slots I used strips of adhesive tape. The stickiness of the tape that I was worried about turns out to be a feature rather than a flaw. It holds the panels in if the building is tipped over or dropped. This could happen with the 3D printed version unless a small bit of tape or a clip is put on each panel. And it looks pretty good.
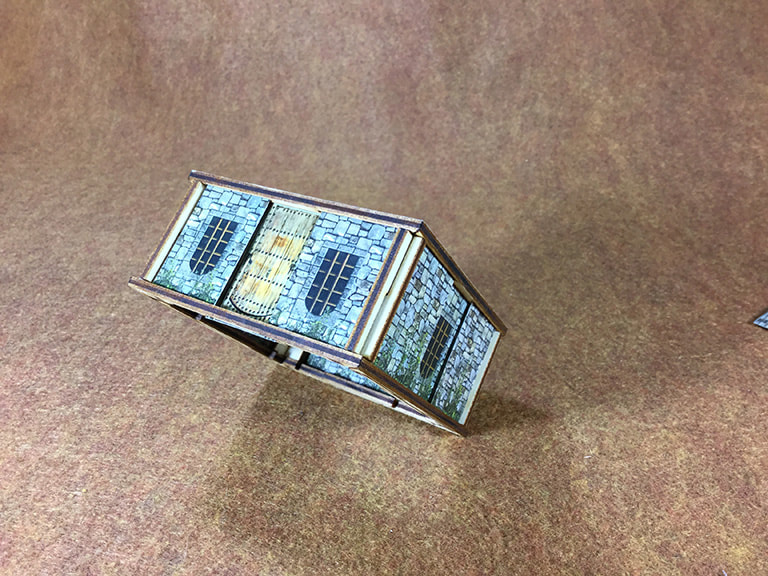
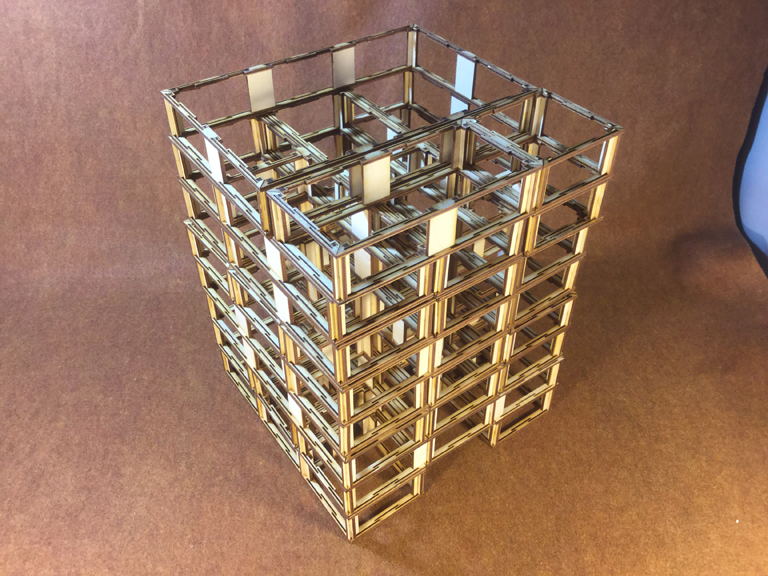
As everything is based off equal size squares, it all stacks nicely. And it's very light. And strong. It's easy to see why birch plywood was used to construct aircraft, even until the Second World War.
As everything is based off equal size squares, it all stacks nicely. And it's very light. And strong. It's easy to see why birch plywood was used to construct aircraft, even until the Second World War.
Here are some files for laser cutting:
| 1x3_block_1_division_-_tile_5r.ai |
| 2_block_open_-_tile_9v.ai |
| 2x3_block_open_-_tile_1v.ai |
A Note on the laser files:
Continuing with design options, I tried reusing the wood patterns as 3D printing files. It's not a direct translation I found out. The laser removes material in the cutting process, so holes get bigger and tabs get smaller. So the laser models are designed with small holes and big tabs to end up fitting with each other after each is cut.
3D printing may shrink holes, or the soft plastic slumps and the hole sides close in. Tabs may also slump and be a bit oversized. So the tabs and holes must be compensated for in a manner opposite to the way the laser cut ones are. I did this for a basic building. The files to download and try are a bit lower.
3D printing may shrink holes, or the soft plastic slumps and the hole sides close in. Tabs may also slump and be a bit oversized. So the tabs and holes must be compensated for in a manner opposite to the way the laser cut ones are. I did this for a basic building. The files to download and try are a bit lower.
| frame_upper.stl |
| frame_lower.stl |
| frame_upright.stl |
A couple more things about the buildings so far... inexpensive craft edging scissors make quick work of creating damages walls..... and plastic doors fit in with the look of the frames, only it means painting again.....